Rotators
Overview
The rotators tab is where you can create custom rotators for your vehicle. Rotators are lights that rotate. This tab is a bit more complex than the ELS tab but it is still quite simple. Here is a breakdown of the rotators tab:
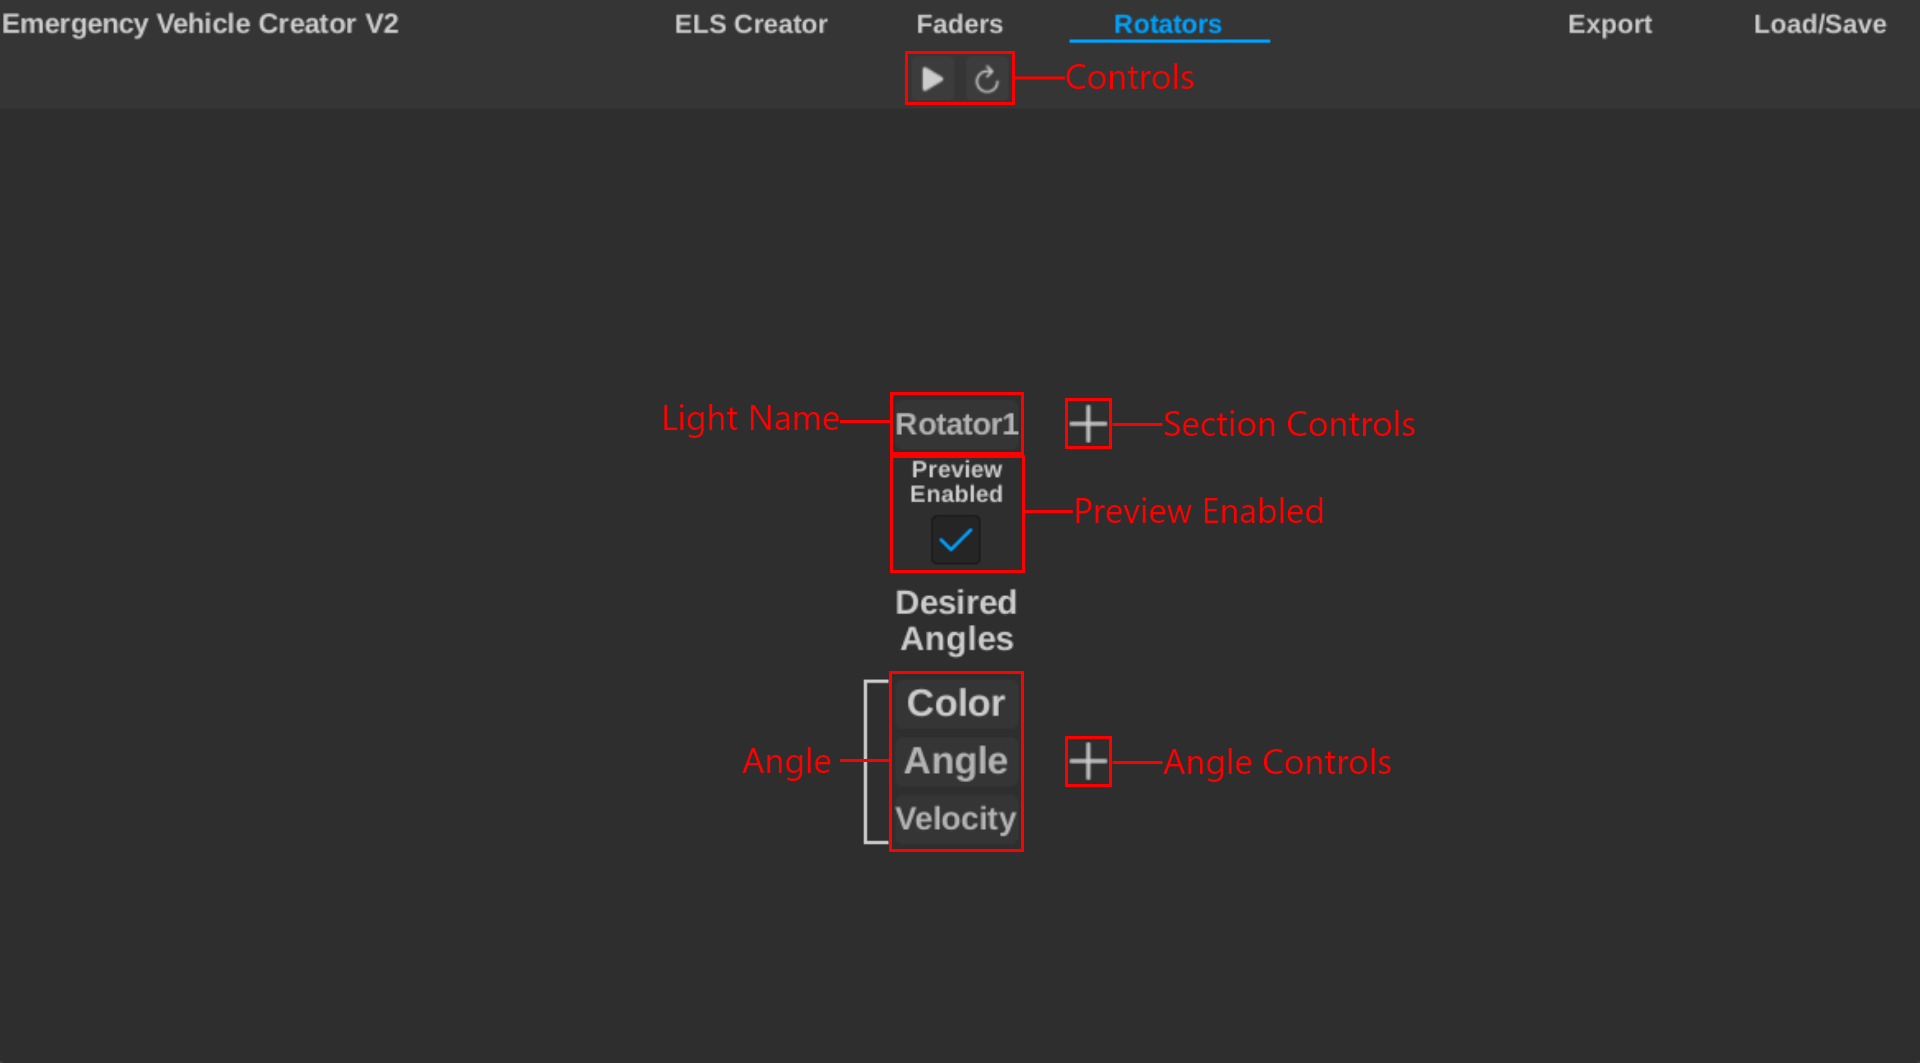
There is a lot going on there, so lets get a brief overview of each label.
These are controls for the entire screen. These controls tend to reappear throughout the plugin.
- Play/Pause: This button plays or pauses the pattern playback. You can also use
p. - Reset: This resets the screen to the default state.
The light name is well, the name of the light inside the lightbar. This textbox will also dissapear and show the current light color when playing back your pattern.
The faders screen is devided into sections, this allows for more organization. These controls allow you to add or remove sections. Adding or removing depends on the current sections position.
You can only preview one fader at a time. Tick this box to enable the preview.
We will go over this below.
These controls allow you to add and remove angles. Angles actually control the rotators angle.
Terminology
A lot of the terminology used in the faders tab is the same as the ELS tab. Here is a quick overview of the other terms used:
- Section: Rotator sections are different. Each section is one light.
- Rotator: Another name for a section.
- Angle: A angle is a frame of the section. It controls the angle goal, speed, and color.
Understanding Angles
Angles are similar to rows in the ELS tab. They are the individual frames of the rotator. Each angle controls the angle goal, speed, and color of the light.
Angles have two important properties: - Angle Goal: This is the angle the light will rotate to. Set this really high to make the light rotate multiple times or forever. - Velocity: This is how fast the light will rotate to the angle goal.
Creating a Rotator
To create a rotator, follow these steps:
- Set the angle goal and velocity.
- Set the color of the light.
- Repeat steps 2-4 until you have the desired pattern.
- Click the "Play" button to preview your pattern.
Next Steps
If you would like to export the pattern onto a vehicle, check out the Exporting a Pattern guide.